Dashboard
Welcome to your payment analytics
Track your payment performance and view detailed transaction history.
Total Volume
$0
0%
Total Transactions
0%
0
Average Transaction
0%
$0
Success Rate
0%
0%
Payment Volume
Payment Methods
USDC (Solana): 0%
USDC (Base): 0%
USDT (Solana): 0%
Payment Source
Web Checkout: 0%
Payment Links: 0%
| Payment ID | Date & Time | Amount | Customer | Source | Status |
|---|
Loading transaction data...
Page 1 of 1
Wallets configuration
Custodial Wallet Balance:
USD
0.00
Choose where to redirect your payments
Select the chains through which you want to be able to receive payments and if you want the payments to be immediately redirected to your own wallet or not.
Points of Sale
Choose how to start collecting payments
Select from our ready-to-use payment solutions for your business.
No code required
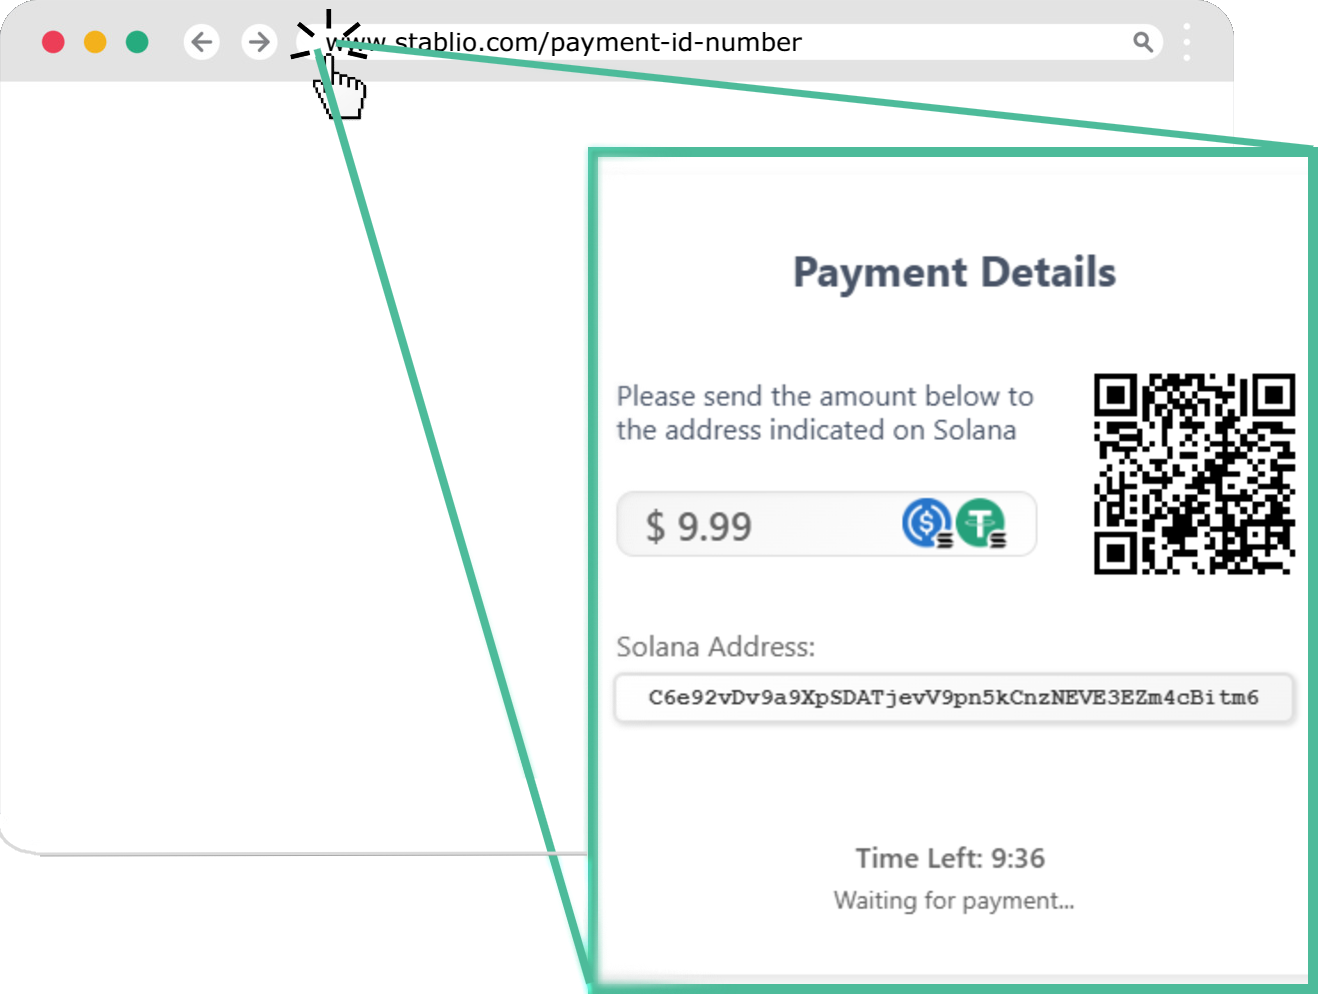
Pay by Link
Create shareable payment links with pre-defined amounts.
Low code required
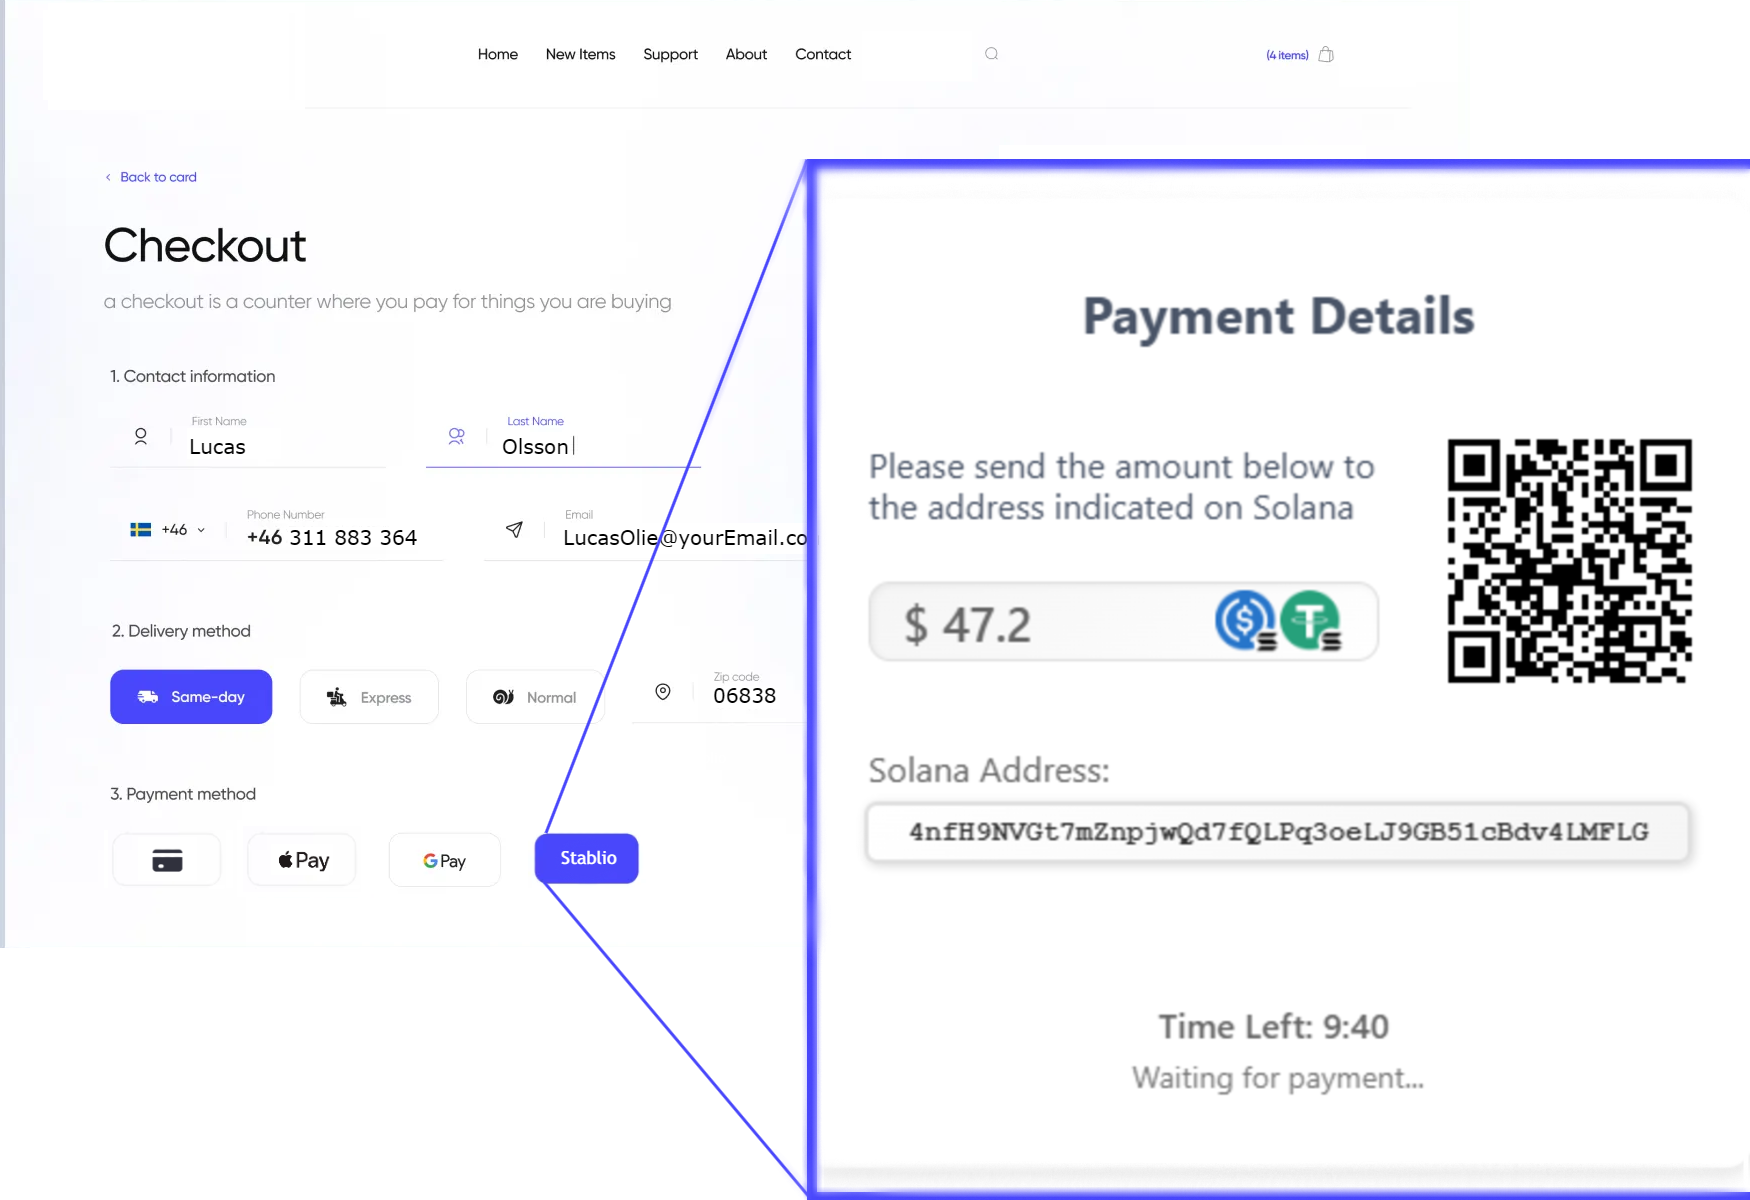
Web Checkout
Integrate our payment solution into your existing website checkout.
Customers
Manage and track your customer payments
View payment history and details for all your customers.
| Customer ID | Total Payments | Total Amount | Latest Payment | Last Status |
|---|
Loading customer data...
Page 1 of 1
Settings
Configure Your Account
Manage your account settings, payment preferences, and notification options.
Account Settings
Use this ID when setting up payment integrations
Generate a new secret key to secure your webhook notifications
Payment Preferences
Notification Settings
Questions? Contact support@stablio.eu